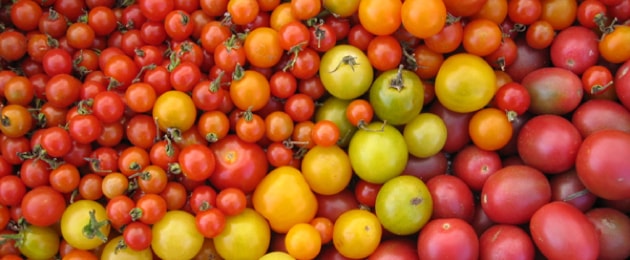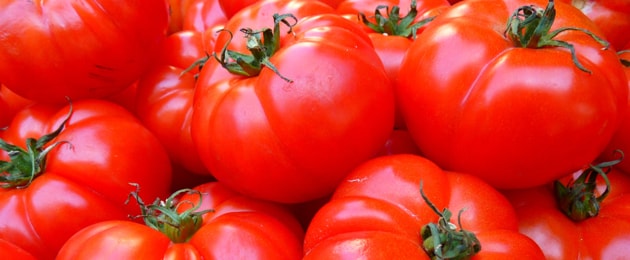
Tips For Growing Tomatoes
Growing tomatoes and other articles about tomatoes are offered a few times on our blog – mainly because they are such a favorite item to grow. In Wisconsin, we relish the summer days when we can take a walk to our gardens and pick them right off the vine – nothing comes close to the flavor of fresh!
Our friends at Hybels Greenhouse in Michigan, who supply many of our plants offered us a few of their tips on growing tomatoes and we added a few of our own.
Growing Tomatoes
When To Start
We suggest starting your tomatoes indoors 4 to 6 weeks before your area’s average last spring frost. You’ll want to use a lightweight seed starting mix/media. Sow the seeds shallow at a 1/8″ to 1/4″ depth. Since seed-starting mix is sterile (garden soil which is not) and is lighter than potting mix, it allows for the ideal air-to-moisture mix that is best. It’s best to use sterile, shallow, containers that have drainage (4-pack or 6-pack from a garden center). Then transplant into larger, 3″ to 4″ containers once the real, scalloped edged leaves have emerged.
Using the Right Medium
If you want to give your tomatoes the strongest start, you’ll need a seed starting mix. These mixes are typically fine in texture to limit resistance to root growth and are designed to retain enough moisture to encourage germination. Don’t make the mistake of starting them in soil straight from your garden. This can cause problems with moisture retention, weeds, and disease. Even a using a regular potting mix is often too chunky for seed starting, with large particles that hinder early root growth and impact germination. A seed starting mix can be purchased from your local nursery or you can make your own. Combine one part peat moss or coconut coir, with one part perlite and one part sifted compost.
Spacing Seeds
Make sure to check the spacing guidelines on the packet of tomato seeds in the planting instructions. Easy to miss, but if you want healthy tomato seedlings, check it and follow those guidelines. Spacing them too close together can cause problems, with disease being the most common issue. Diseases like blight and powdery mildew can spread far more easily between closely spaced plants due to the lack of airflow. Too close together also means competition for resources, leading to growth problems and leggy stems.
Watering & Air Flow
Most often, watering too much is the biggest problem. Wet, soggy soil impacts the germination and root growth and encourages diseases that will kill them before your seedlings event get started. they get started. Watering too little is also damaging, as lack of moisture halts early growth. To maintain the right moisture levels, try watering from the bottom. Place the seedling tray inside a bottom tray filled with fresh water. The soil will absorb the moisture through the drainage holes, and the excess can then be poured out to keep the roots from sitting in soggy soil.
Stagnant air encourages the growth of diseases and may make stems weaker and less able to handle wind when transplanted outside. Provide airflow around your seedling trays if you’re sowing indoors. You could use a small fan on a low setting to blow through the stems. This will strengthen them over time and limit disease risk. Otherwise, make sure there is an open window or some airflow as long as it’s not cold air.
Hardening Off
Hardening off is a process that allows seedlings to get used to the outdoor environment before transplanting. Going from a controlled environment to the outdoors can be a shock to plants. The transplanting process is stressful enough. Hardening off ensures they will adapt to their outdoor spot quicker. Begin by exposing your them to outdoor conditions for a few hours a day a week or two before transplanting. Gradually increase the time and then bringing them indoors at night to prevent any damage from the cold. After this period of time, your seedlings will be ready for transplanting.
Transplanting & Support
When you are ready to transplant your seedlings outside, we suggest you either plant them deeply, burying the stem leaving 1-2 sets of leaves above ground; or you can set each plant almost at a horizontal angle in the ground and leave 2 sets of leaves above ground. The part of the stem buried will then sprout roots and help develop a strong and extensive root system. The part of the seedling above the ground will then naturally reach toward the sun and begin to right itself. Now you may place any cages, stakes, or any other kind of supports in the ground right after transplanting which will avoid damage to the root.
Growing Temperatures
For best results, tomatoes thrive in warm temperatures with at least 6 to 8 hours of direct sun. Always wait until the last frost has passed to plant your tomatoes. Then transplant them outdoors when the daytime temperature is at least 45°F, and when the soil temperature is about 70ºF – 90ºF. Temperatures above 55°F at night are required for fruit set. Temperatures above 75°F at night in the summer will inhibit fruit set and may cause blossoms to drop, resulting in no fruit production. Before you transplant you should wait until night temperatures are at least 45°F.
Plant Types
Right after planting, use a tomato cage or stake to support your tomato plants. When purchasing your tomato plants, read the labels first to discover if they are Indeterminate or Determinate. This will help you determine how large your plants will ultimately grow and the support you will need.
Indeterminate Type Plants: These plants will need large tomato supports as they grow to 6 feet plus and produce a large crop of fruit. These tomatoes continue growing and setting fruit all season.
Determinate Type Plants: These tomatoes have a more compact and bushier growth habit perfect for pots on the patio or hanging tomato bags and baskets. They set fruit over a 4 to 6-week period only and then stop, which makes them a great choice for using in pastes and for canning. Medium size supports are recommended to help with the amount of fruit they produce and to keep the vines off the ground.
Space Requirements
It is important for your plants to have plenty of room to grow. Having extra space surrounding your plants increases air circulation, which helps prevent diseases from occurring. Space the long growing vines of indeterminate tomatoes about 3 feet apart. Compact, determinate tomatoes can be grown about 2 feet apart.
When growing your tomatoes in containers, use an 18 to 24-inch size pot for an indeterminate variety, or a 16 to 18-inch size pot for a determinate variety. For best results, fill containers with a premium prepared soil mix. Smaller size pots may be used but are not ideal as they will dry out quickly and require daily or even twice daily watering.
To save on space, leaf lettuces and spinach can be grown in the partly shaded area near your tomatoes. The lettuce and spinach will be ready to harvest soon after the tomatoes are planted. In addition, try planting basil near your tomatoes as it will naturally repel whiteflies, spider mites, and aphids. The basil will also improve pollination for your tomatoes as it attracts bees and even improves tomato health and flavor.
Feeding
Tomatoes are heavy feeders and need a constant supply of nutrients. Mix 3 to 4 inches of compost into your existing soil to provide nutrients and retain moisture. Have your soil tested to determine exactly what type and how much fertilizer you should give your tomato plants. If you decide not to do a soil test, apply a slow release fertilizer to the soil at the beginning of the season. Make a second application mid-season, if needed.
After Planting
Immediately after planting, water your tomato seedlings thoroughly to help them settle into the soil. Throughout the growing season water regularly, with at least an inch of water per week. Feel the top inch of soil; if it is dry, then it’s time to water. Lastly, cover the ground with 2 to 4 inches of a straw or shredded leaf mulch to minimize weeds and keep the soil evenly moist.
Helpful Hint: Did you know, for an extra strong tomato plant, you can bury two-thirds of the stem when planting? This allows extra roots to sprout along the buried stem, making a stronger plant that is better able to take in water during a drought. *This planting method works only with tomatoes and tomatillos, and not with other vegetables.
Prolonging Harvest
It is important to read the tomato label to discover how long it will take your tomato to grow and produce a harvest. To prolong your tomato harvest, combine early season varieties, such as Early Girl (matures in approximately 59 days) or Independence Day (matures in approximately 49 days) with later tomato varieties such as Beefmaster and some heirloom varieties that mature in approximately 80 days.
Happy Growing!